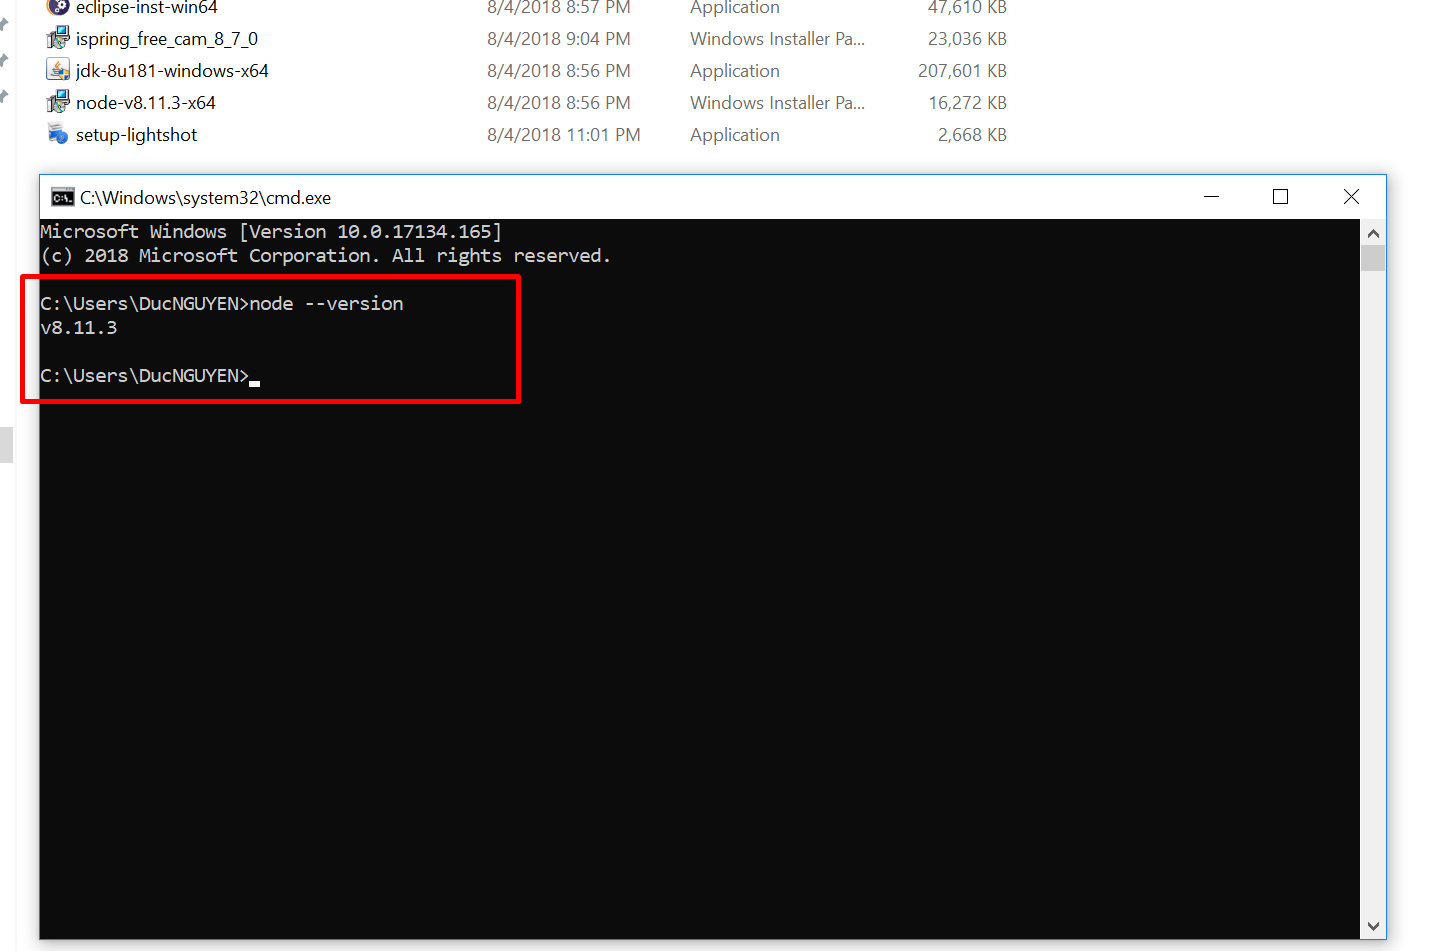
Step 1. Check if you already installed JDK or JAVA_HOME
Open Command Prompt by hit
Window + R keys, type
CMD
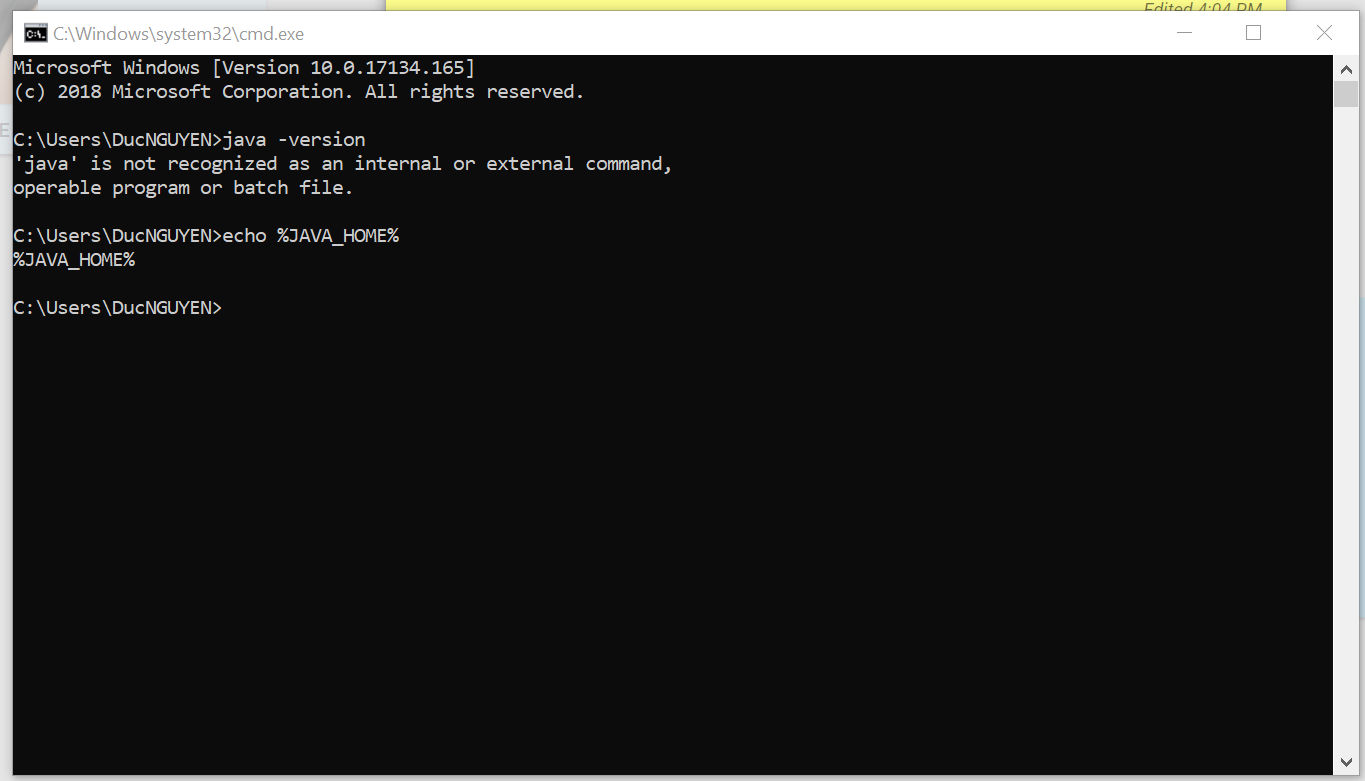
Java and JAVA_HOME were not setup
If you have a screen likes above, you are probably needed to install
JDK and setup
JAVA_HOME variable
You can also check if you had installed by checking in explore
C:\Program Files\Java
If you have a screenshot likes below, you can skip
Step 2.
[caption id="attachment_200" align="alignnone" width="1298"]
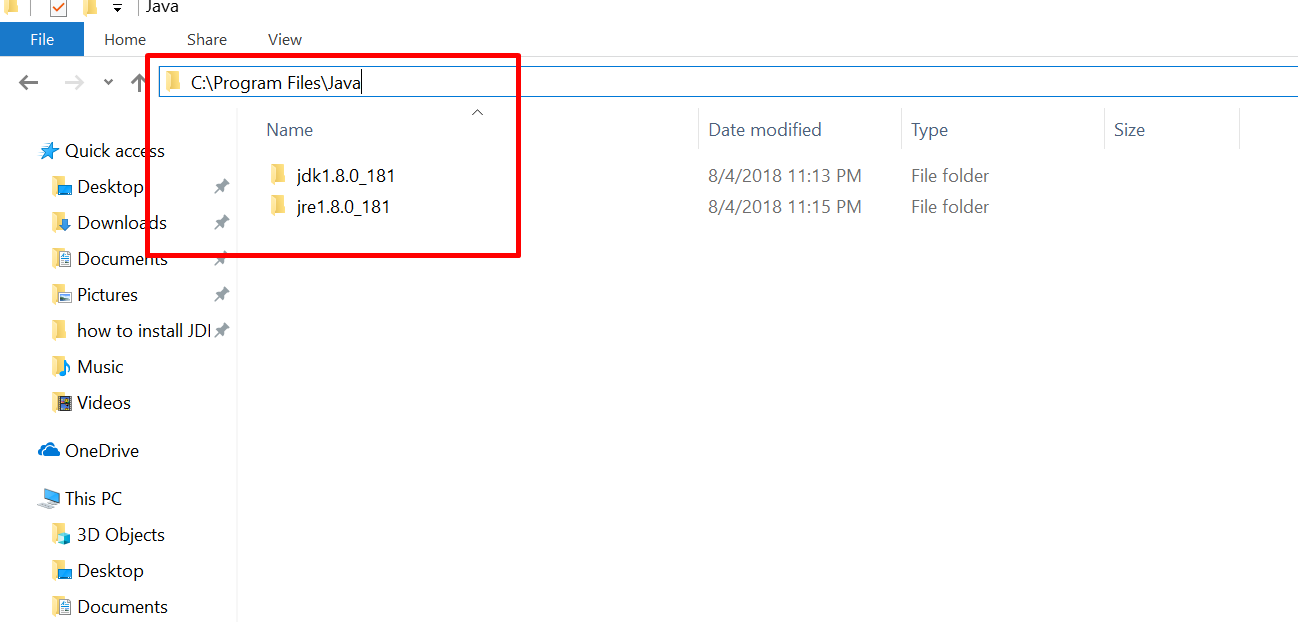
Installed JDK version 1.8.0.181[/caption]
Step 2. Install JDK
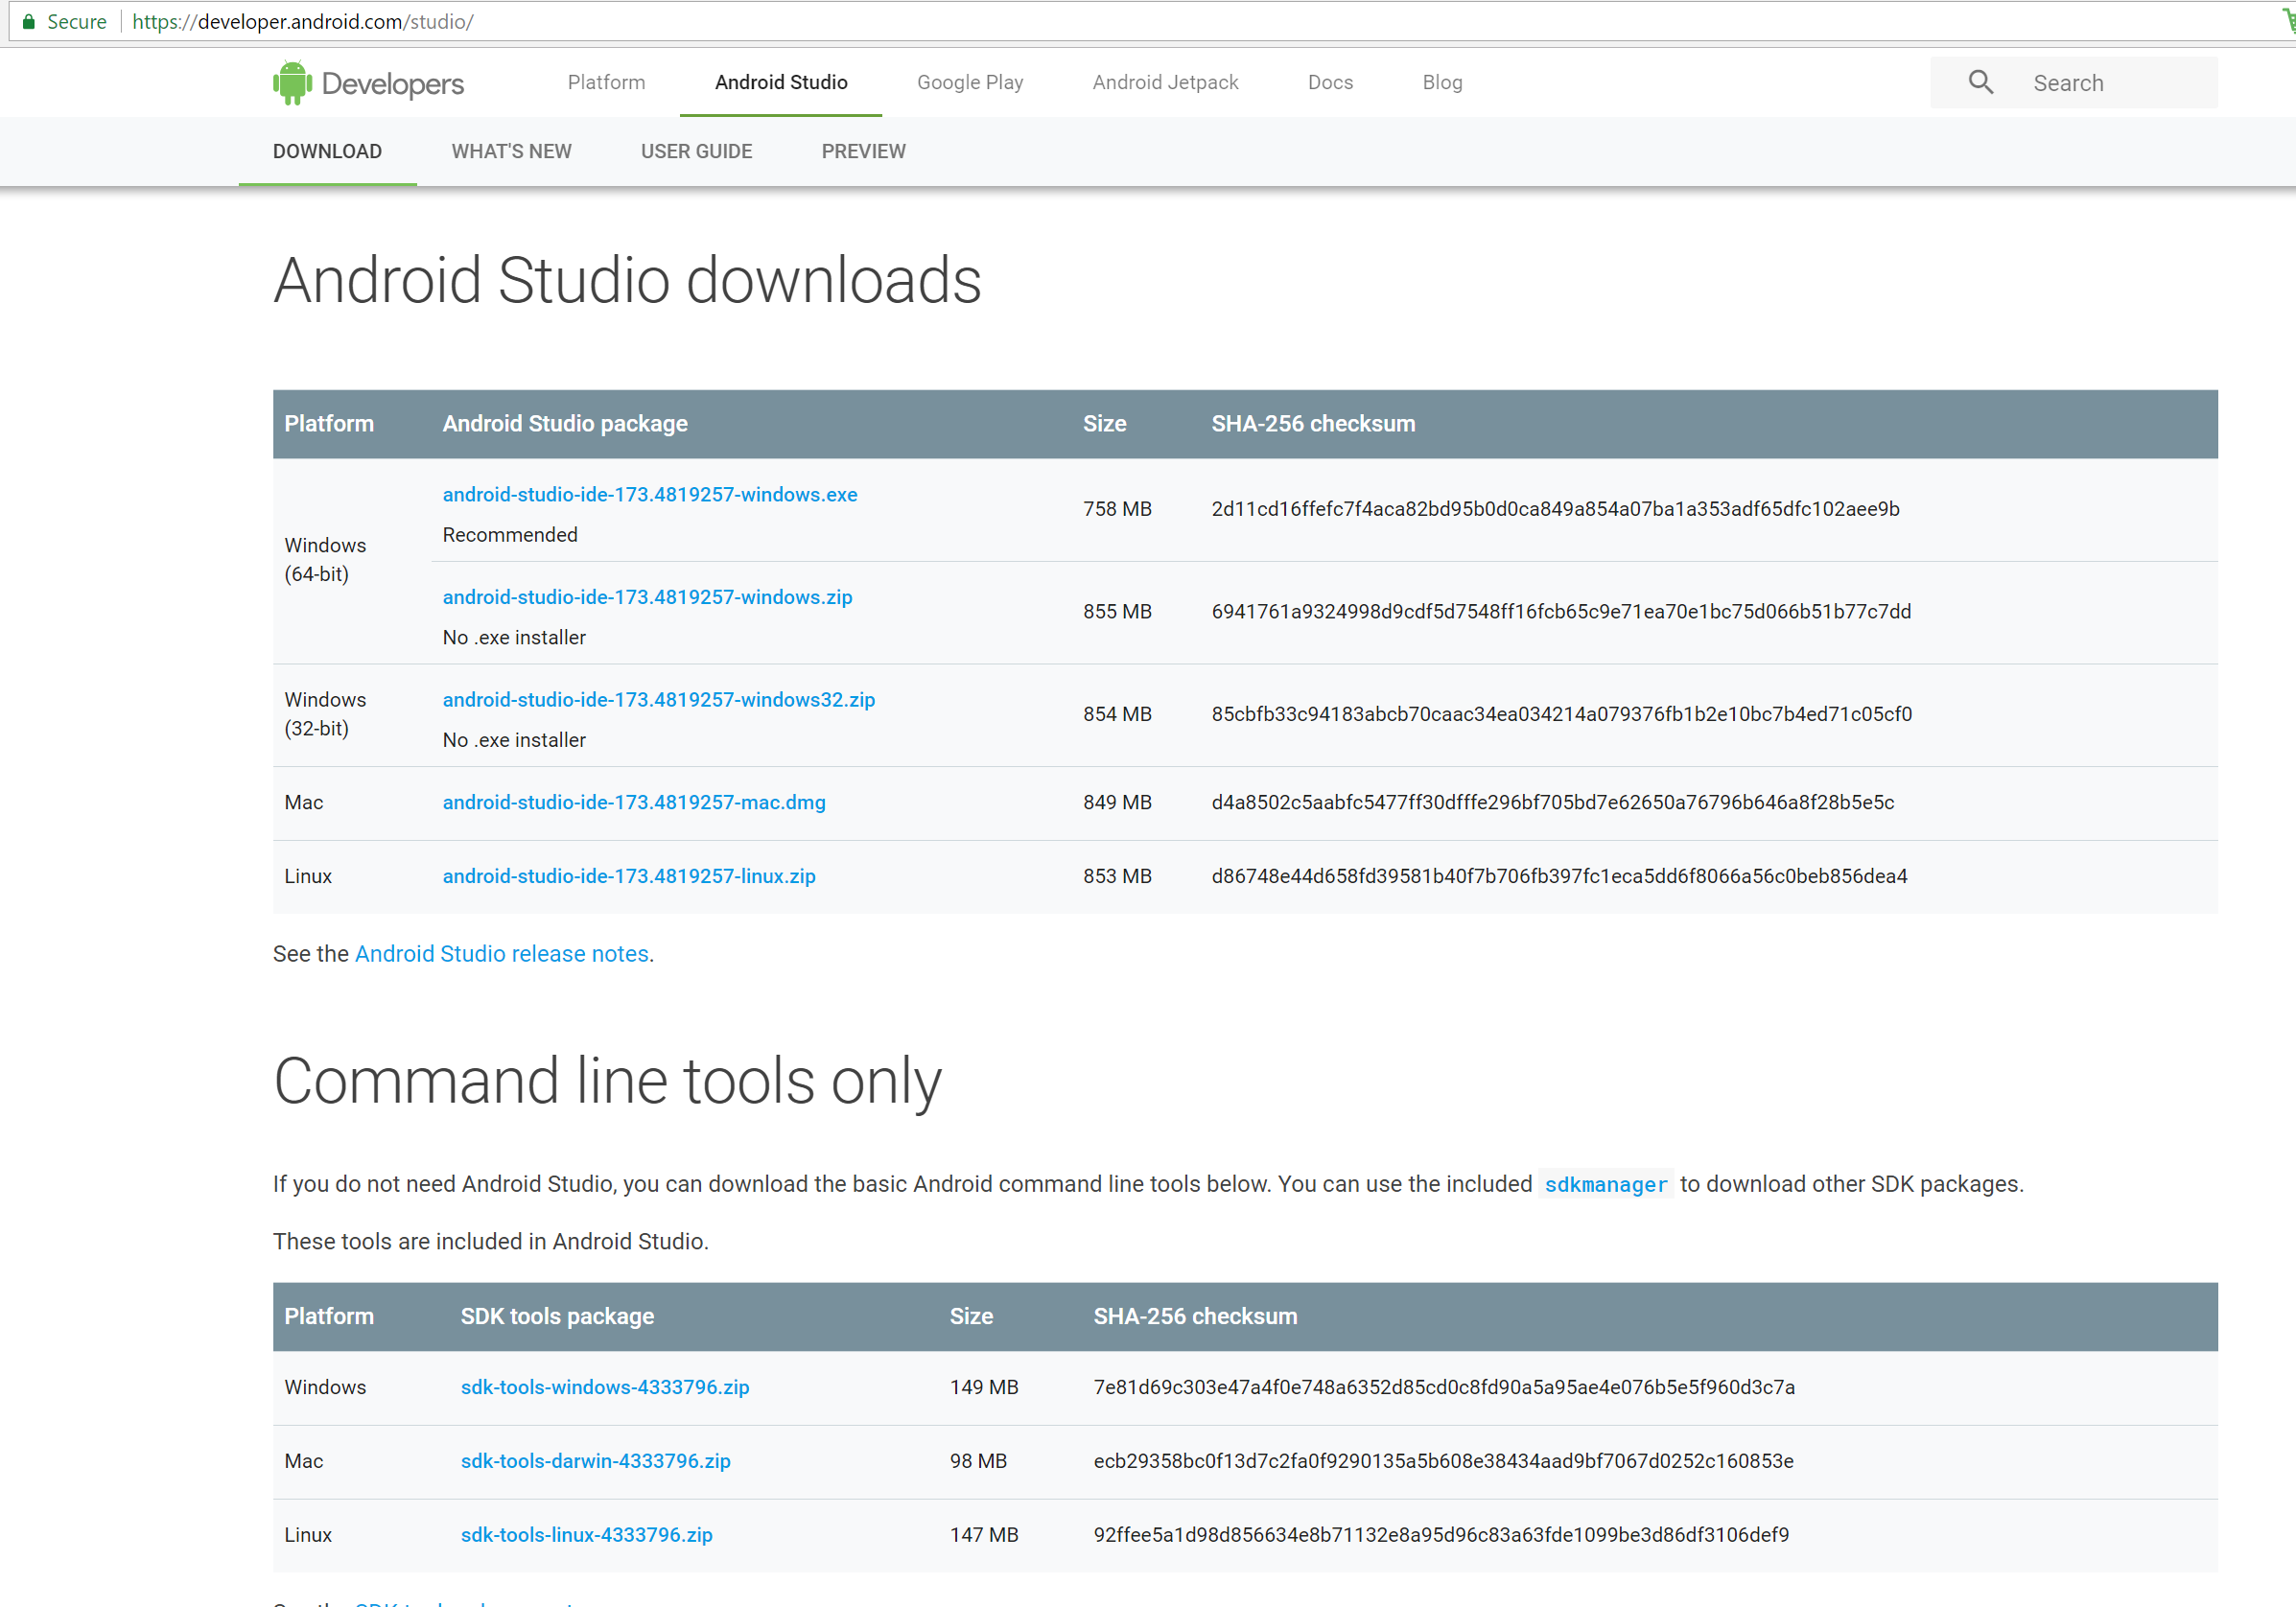
Open Google and search for "JDK download"
[caption id="attachment_194" align="alignnone" width="1258"]
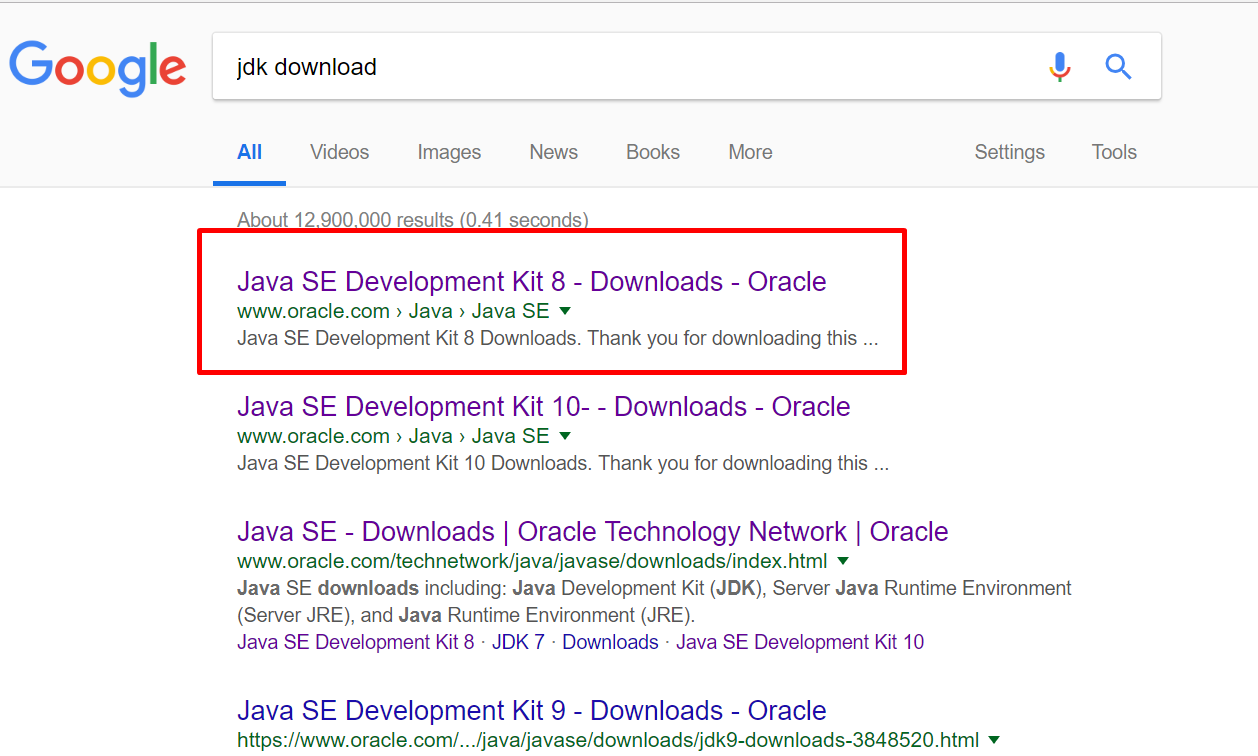
Choose URL with www.oralce.com[/caption]
Download JDK 8 version, it is optional to choose JDK version, at the time of this article JDK 8 is best suitable for development
[caption id="attachment_197" align="alignnone" width="1681"]
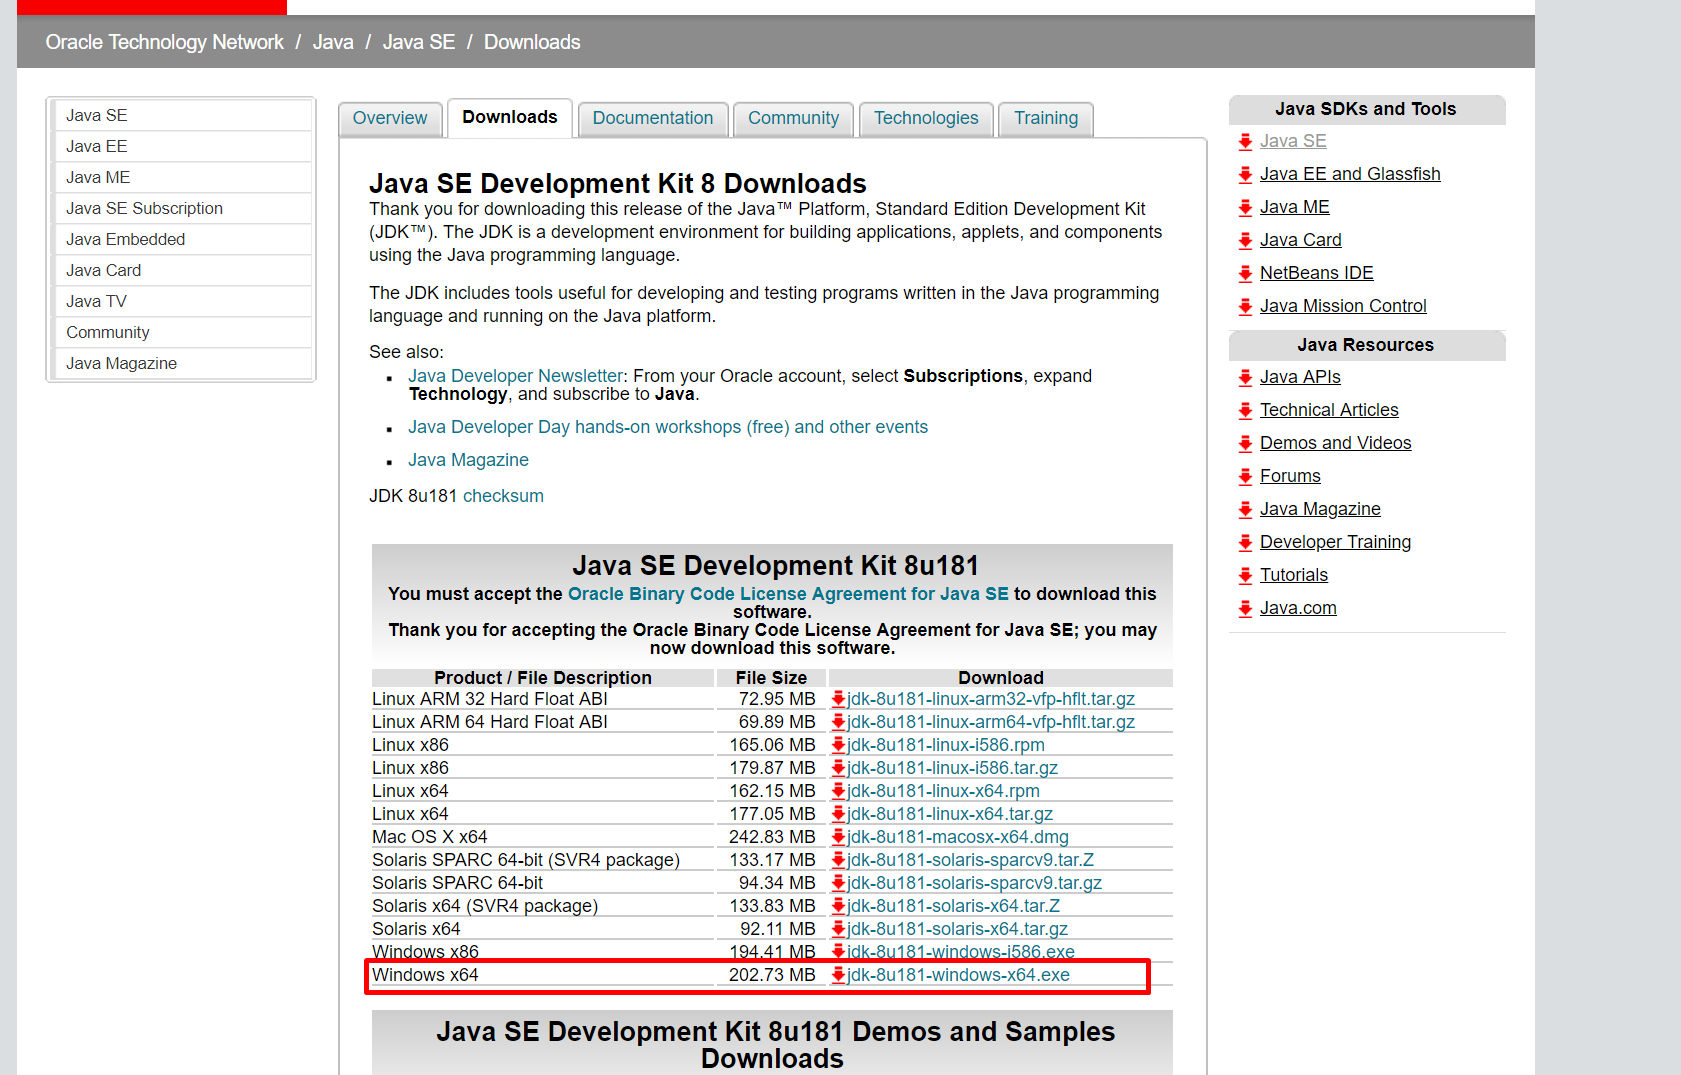
Choose JDK 8[/caption]
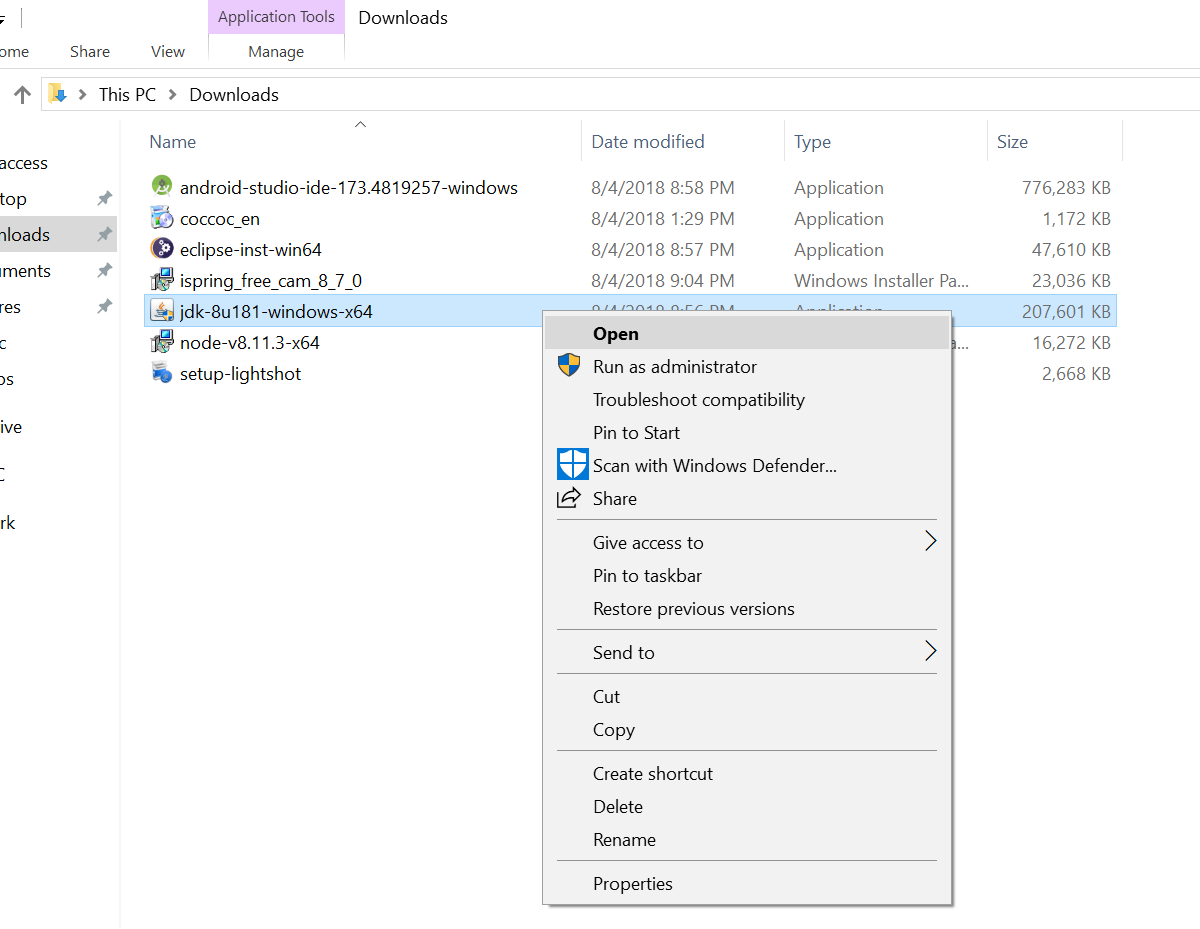
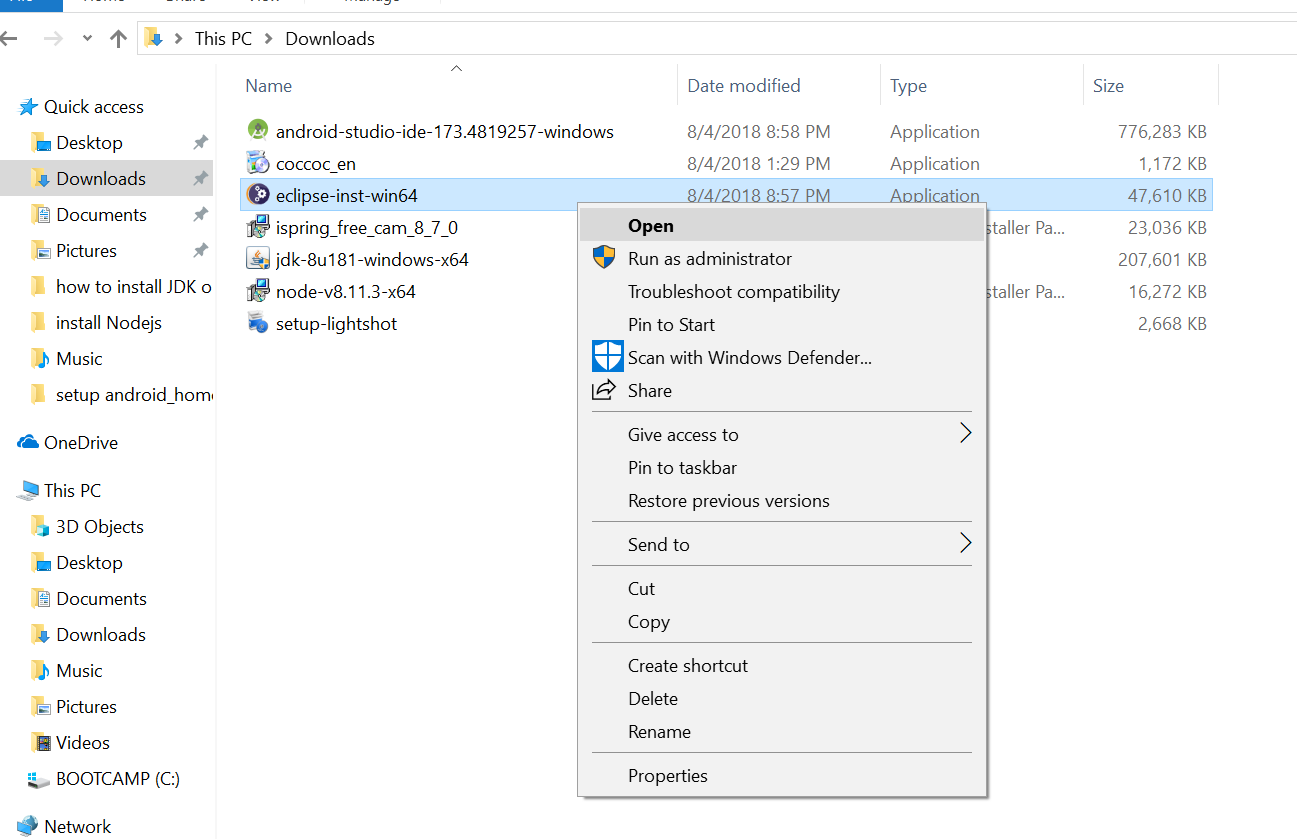
Install by click on downloaded JDK
[caption id="attachment_196" align="alignnone" width="1200"]
Install the JDK after download finished[/caption]
Noted the location of JDK
[caption id="attachment_198" align="alignnone" width="1103"]
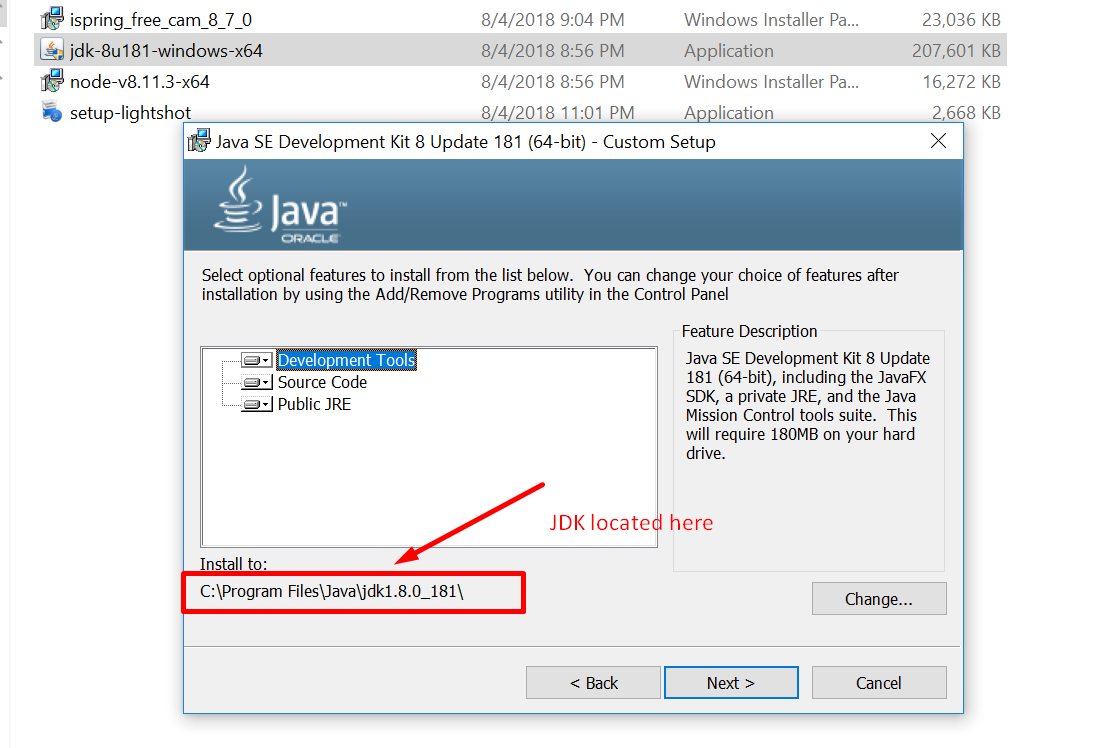
Note the location of JDK[/caption]
It may requires to install JRE, we will install the JRE also.
[caption id="attachment_199" align="alignnone" width="1583"]
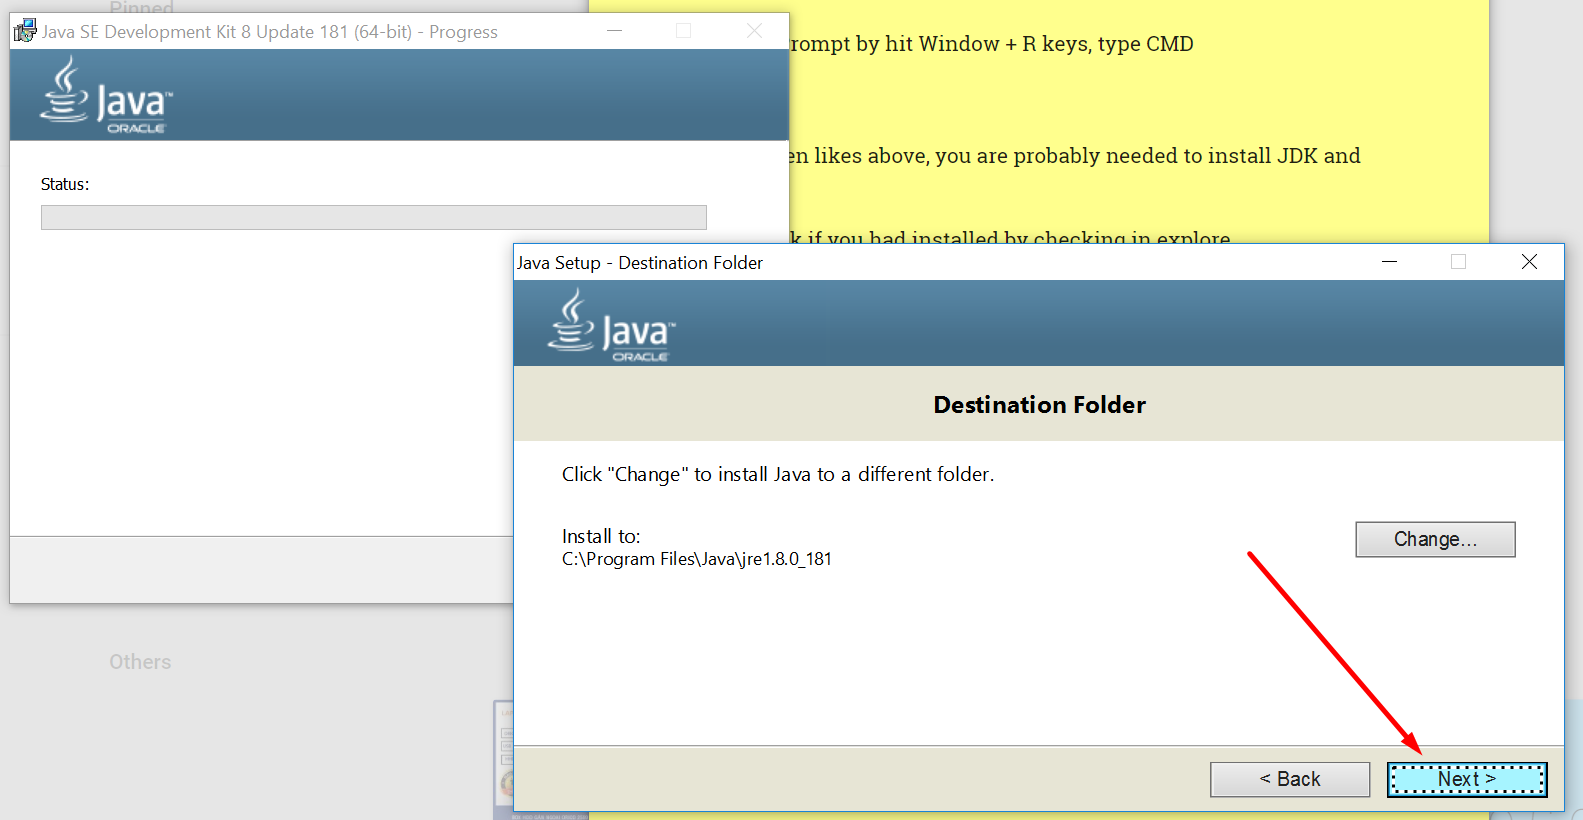
Install JRE also.[/caption]
Installed successfully.
[caption id="attachment_201" align="alignnone" width="832"]
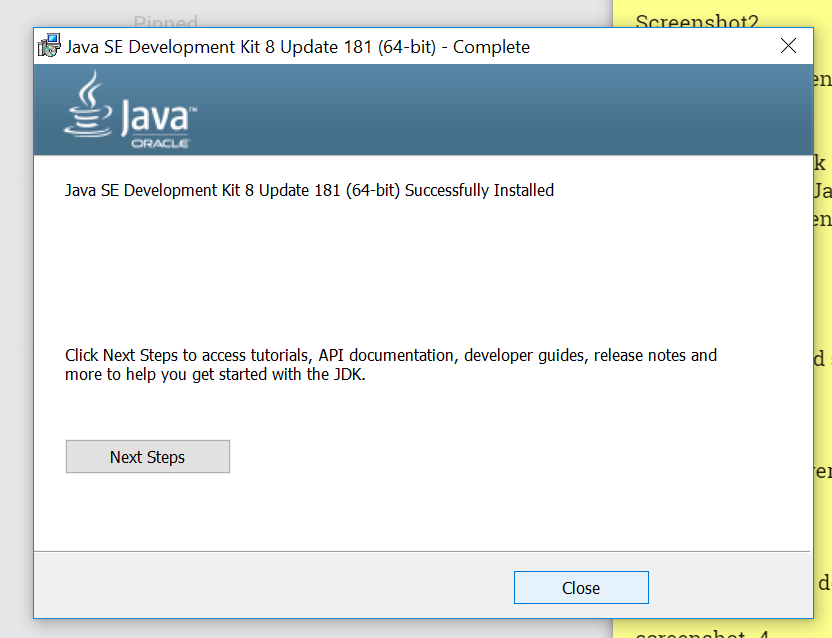
Installed successfully[/caption]
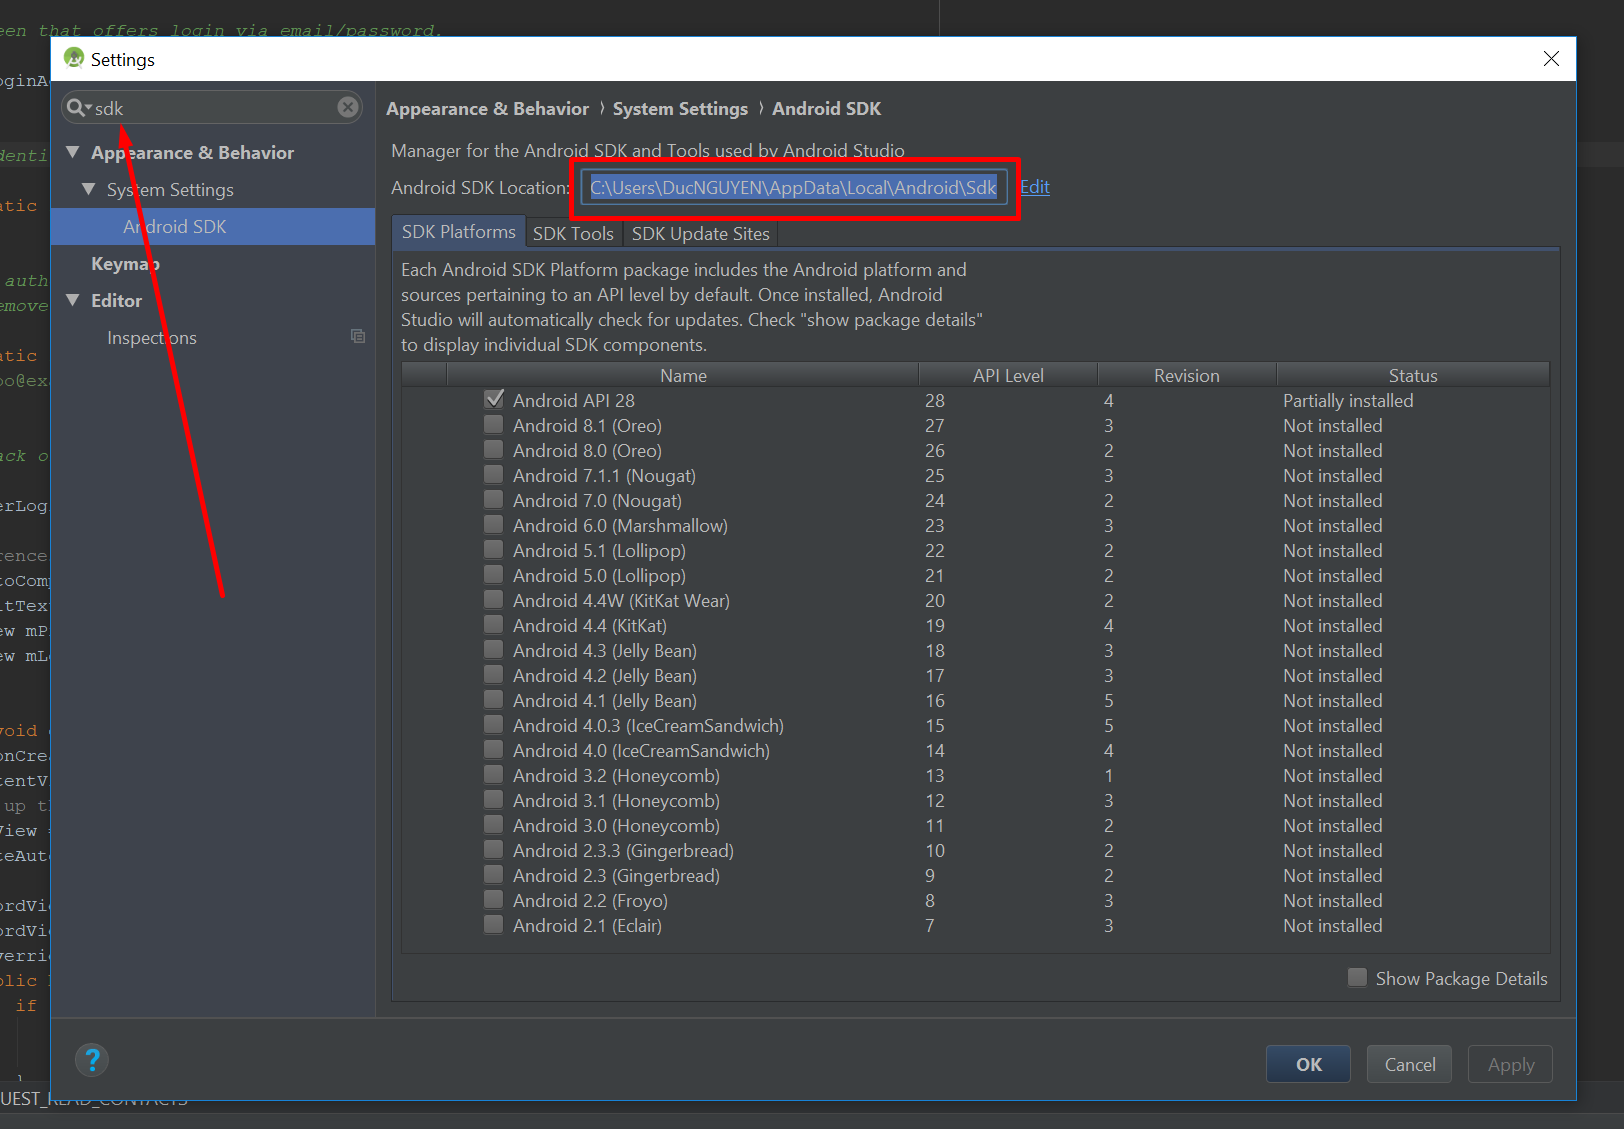
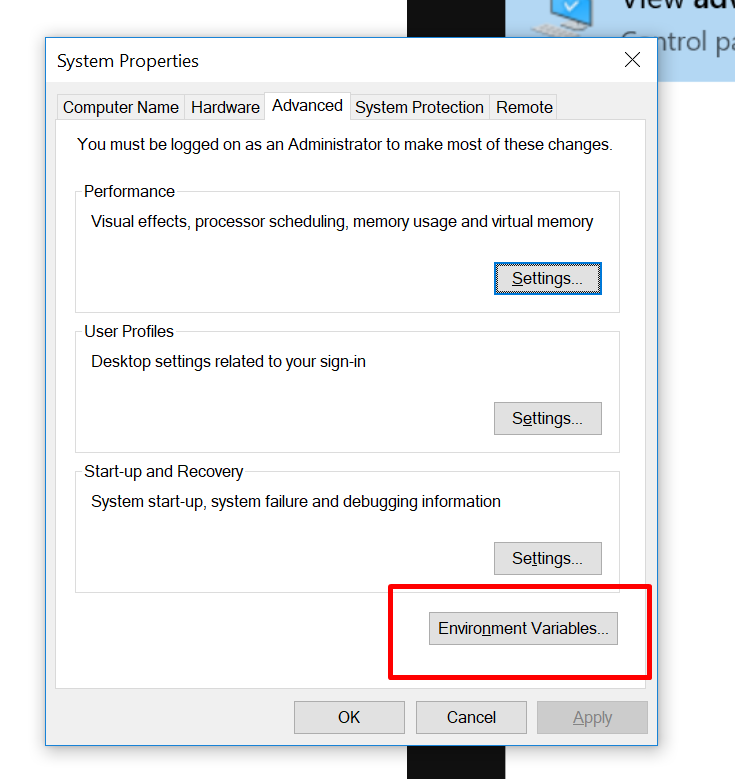
3. Register java and JAVA_HOME to environment variables.
Open
Explored, right click on This PC and choose Properties
[caption id="attachment_202" align="alignnone" width="740"]
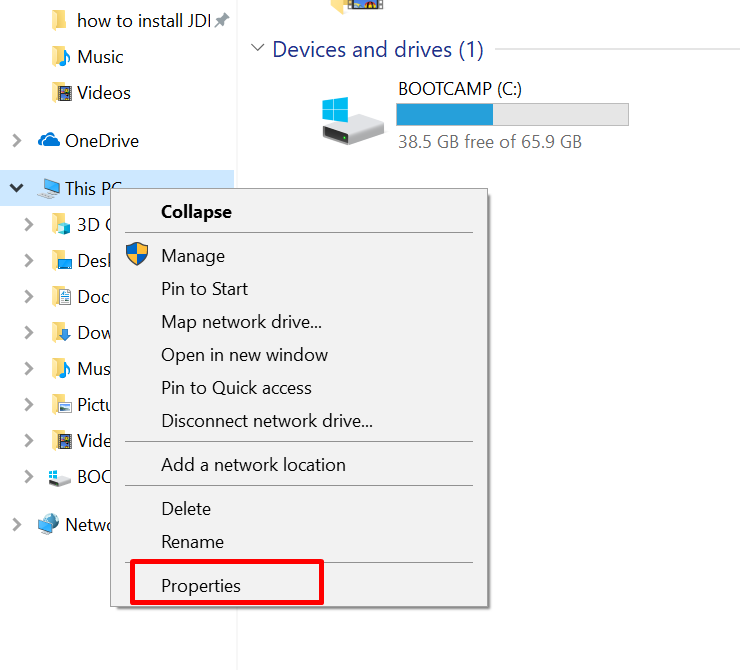
This PC --> Properties[/caption]
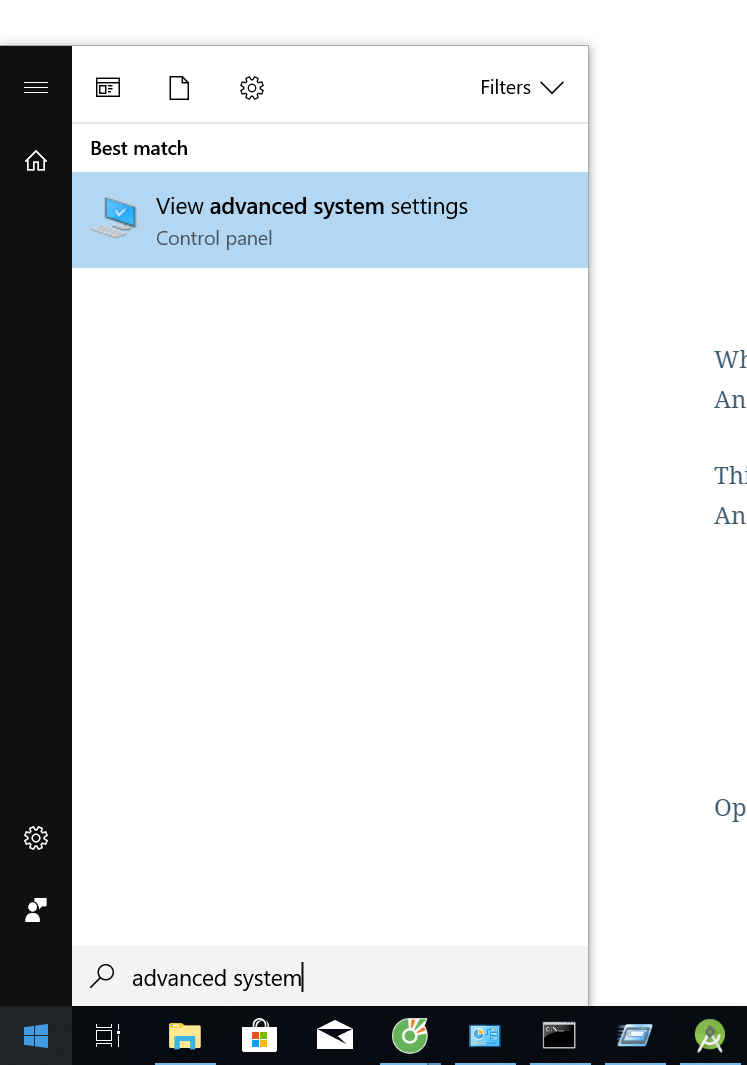
Choose
Advance system sttings:
[caption id="attachment_203" align="alignnone" width="1473"]
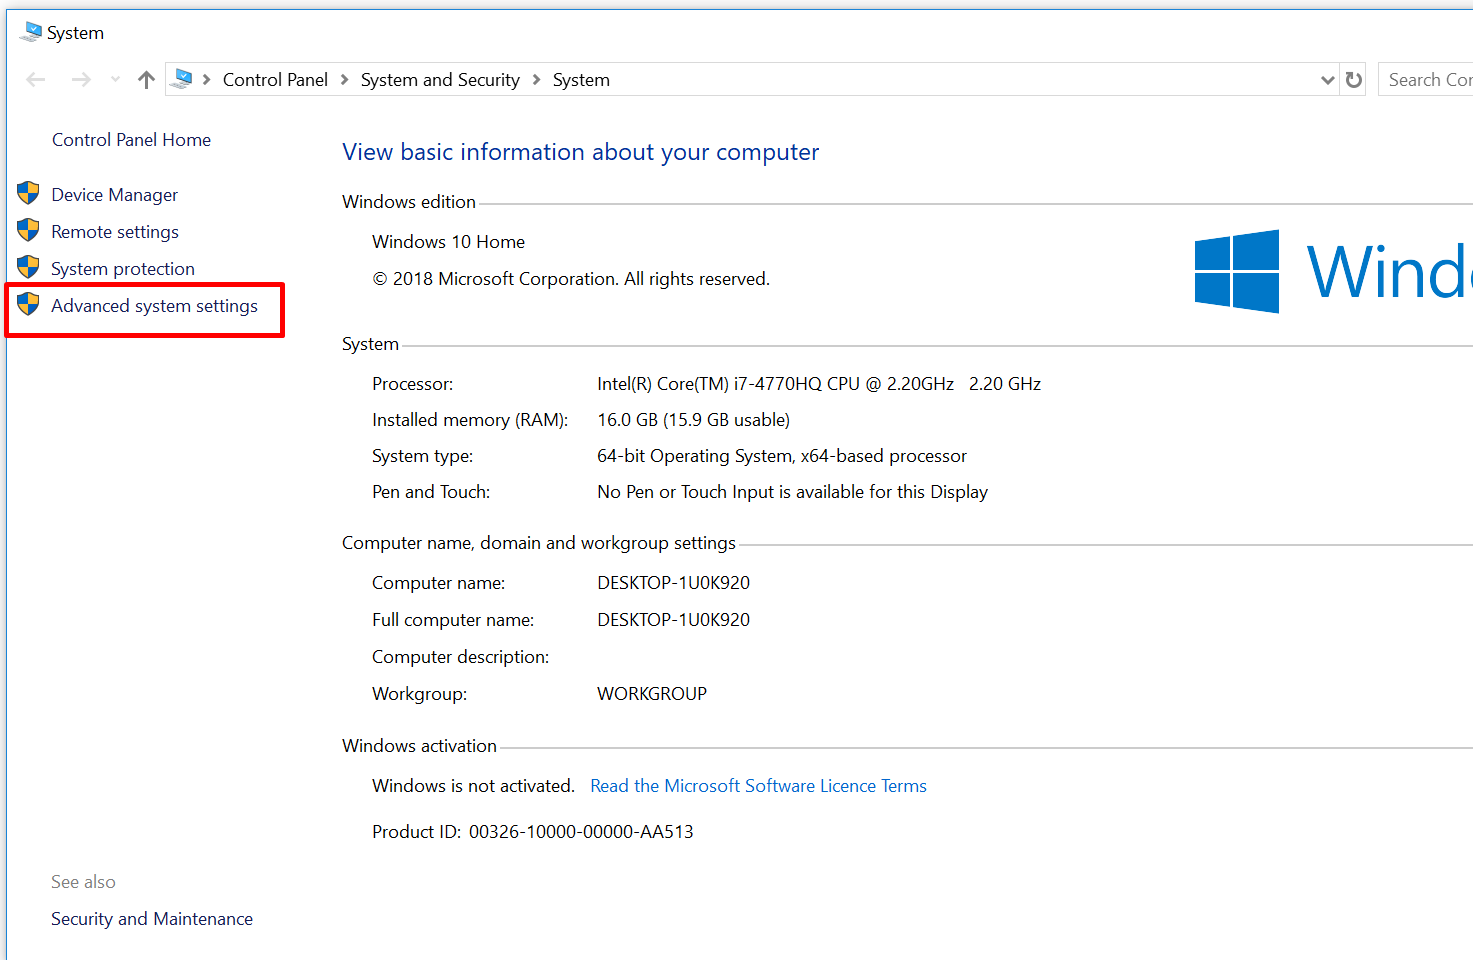
Advanced system settings[/caption]
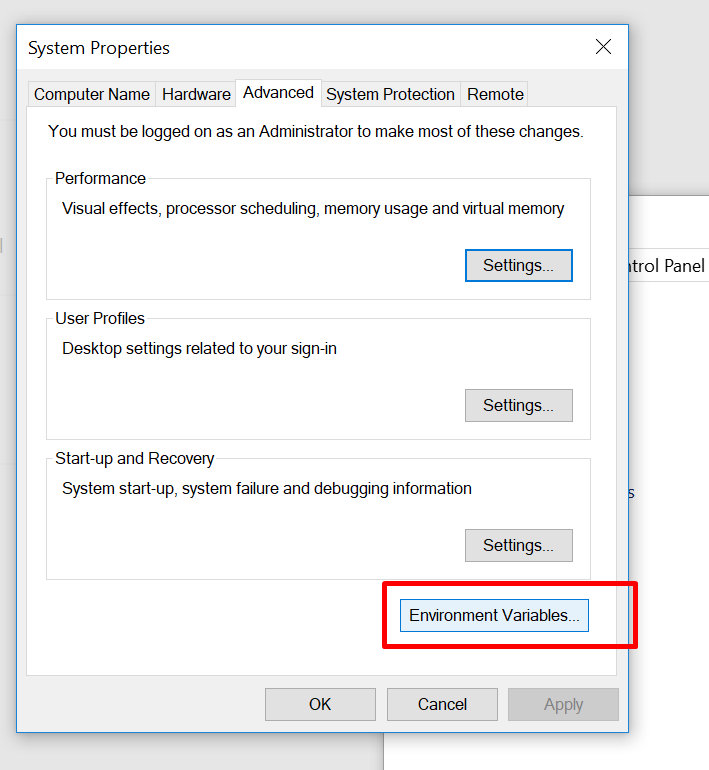
Choose
Environment Variables
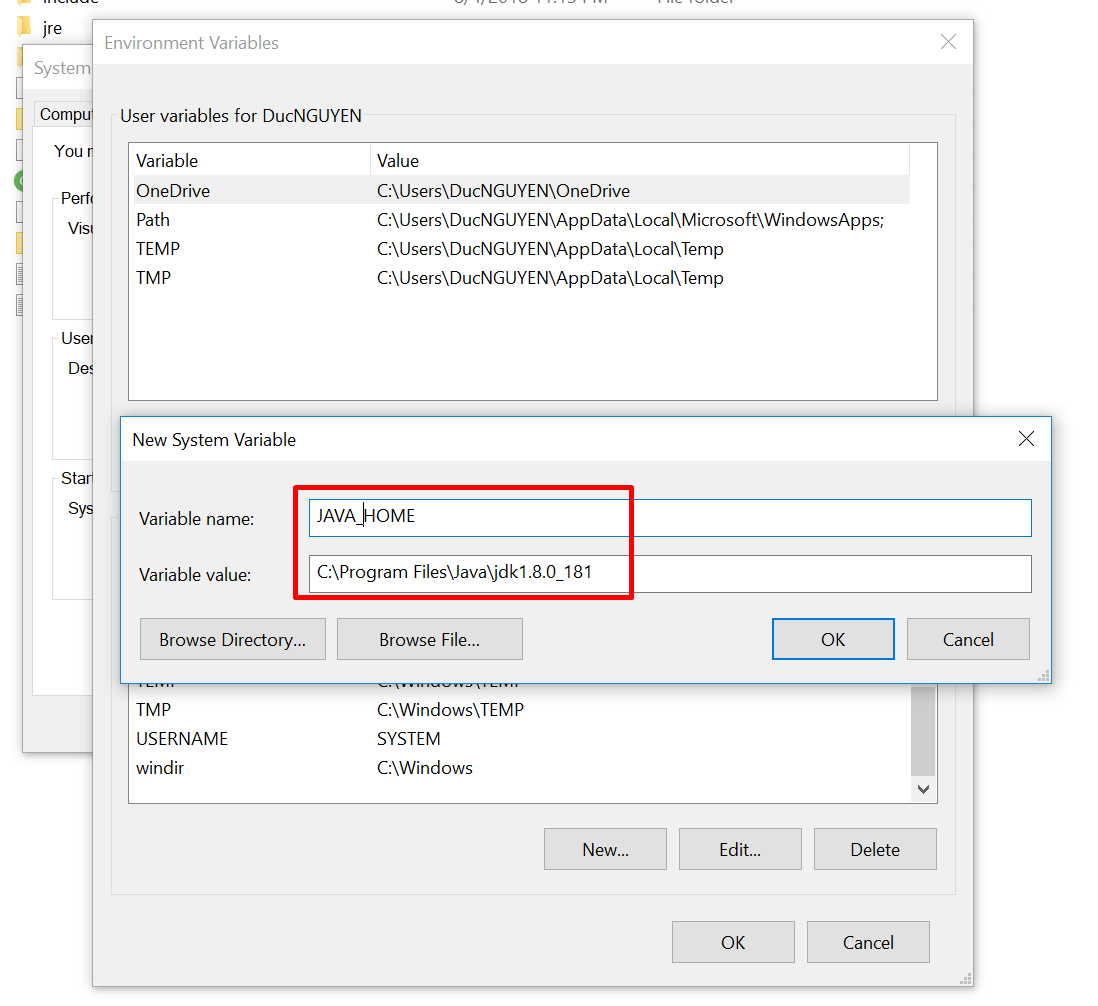
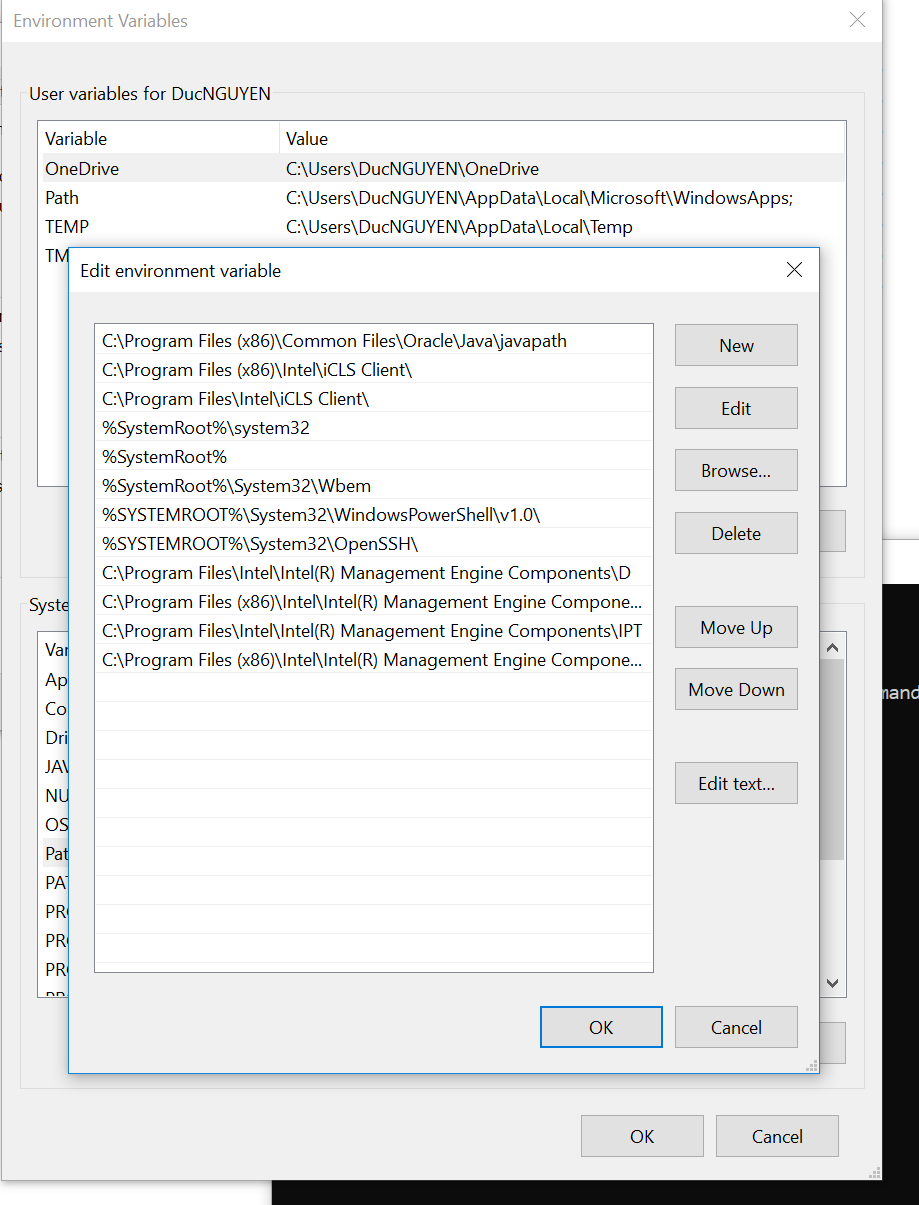
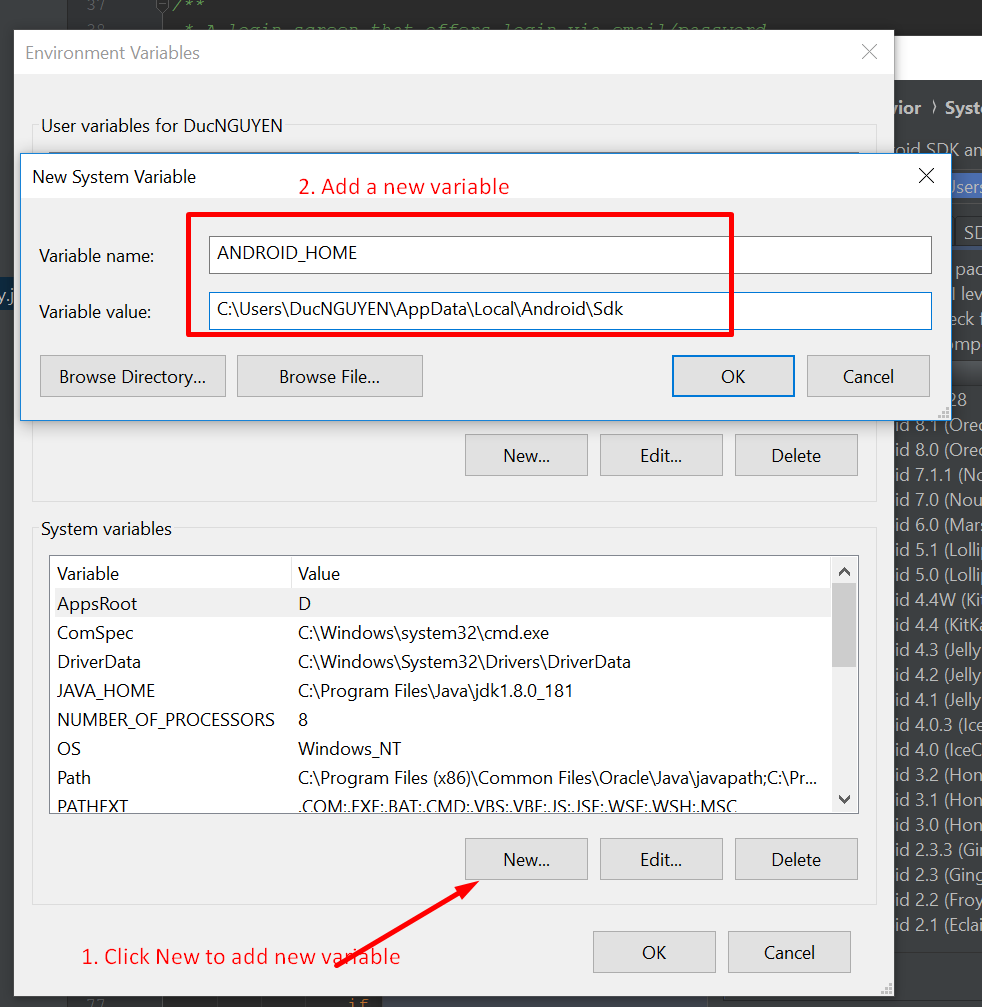
Now create new variable -

Add the
JAVA_HOME variable with the value is JDK location in
Step 2-
C:\Program Files\Java\jdk1.8.0_181
[caption id="attachment_206" align="alignnone" width="1098"]
Click OK to save the value[/caption]
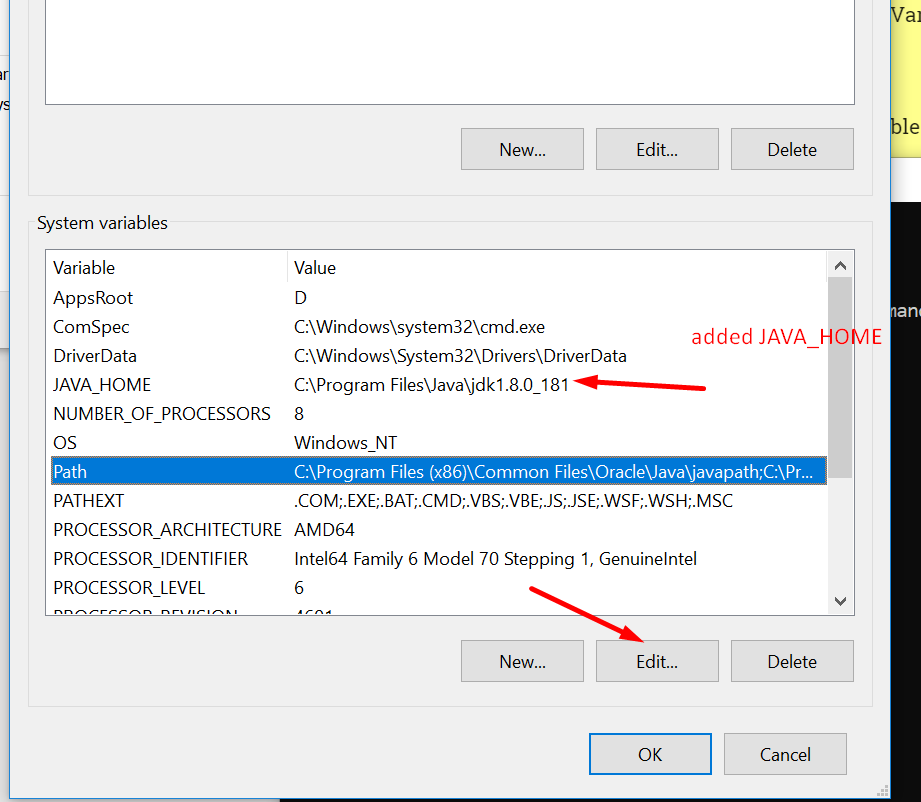
Edit
PATH variable to add
java to
PATH
Choose Path and click Edit[/caption]
The screen depends on Window version, if you are in Window 10, You will have screen like below
Click on New to add new Variable[/caption]
Click on new to add new value
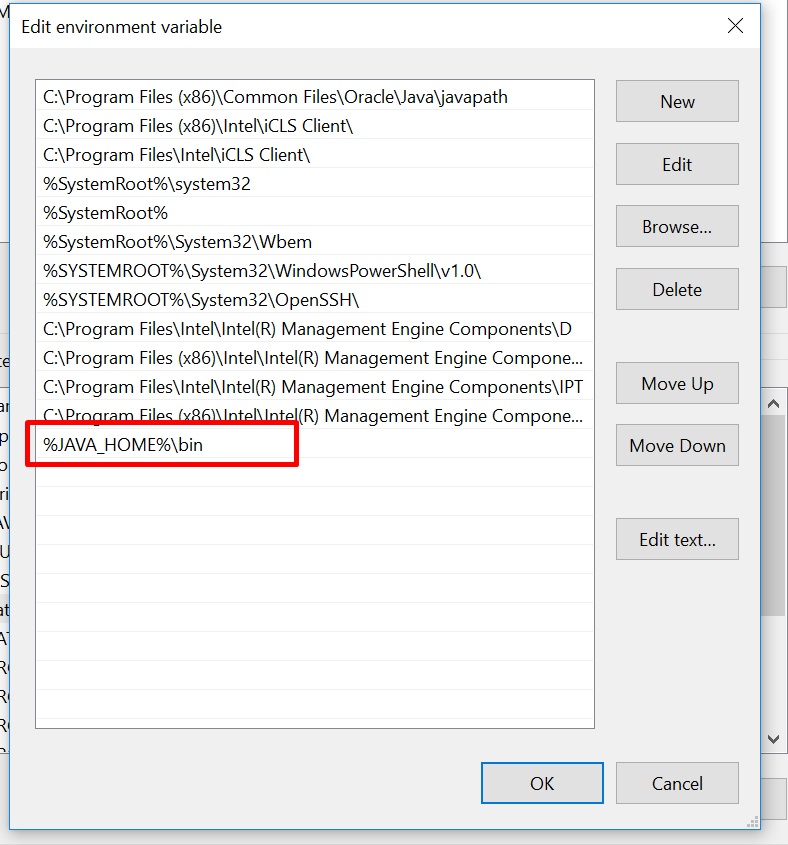
Click OK to save the value
Now save all the value by hit OK util we exist the Advance system testing screen.
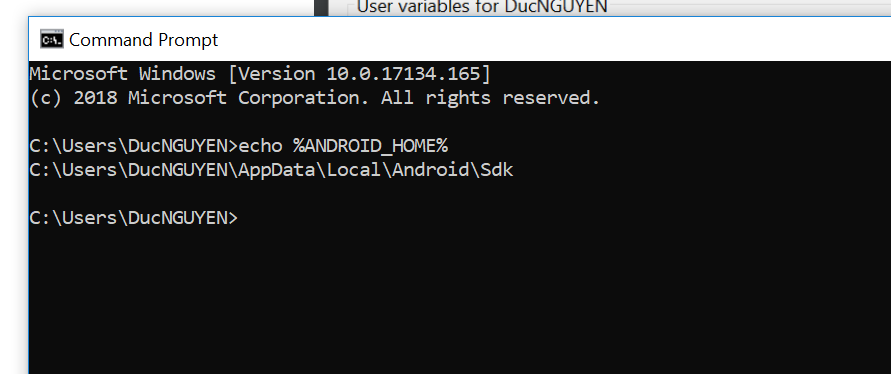
4. Test the result
You should open a new Command Prompt to test the result
Hit
Window + R , type
CMD and hit
Enter
type
javac -version and
echo %JAVA_HOME%
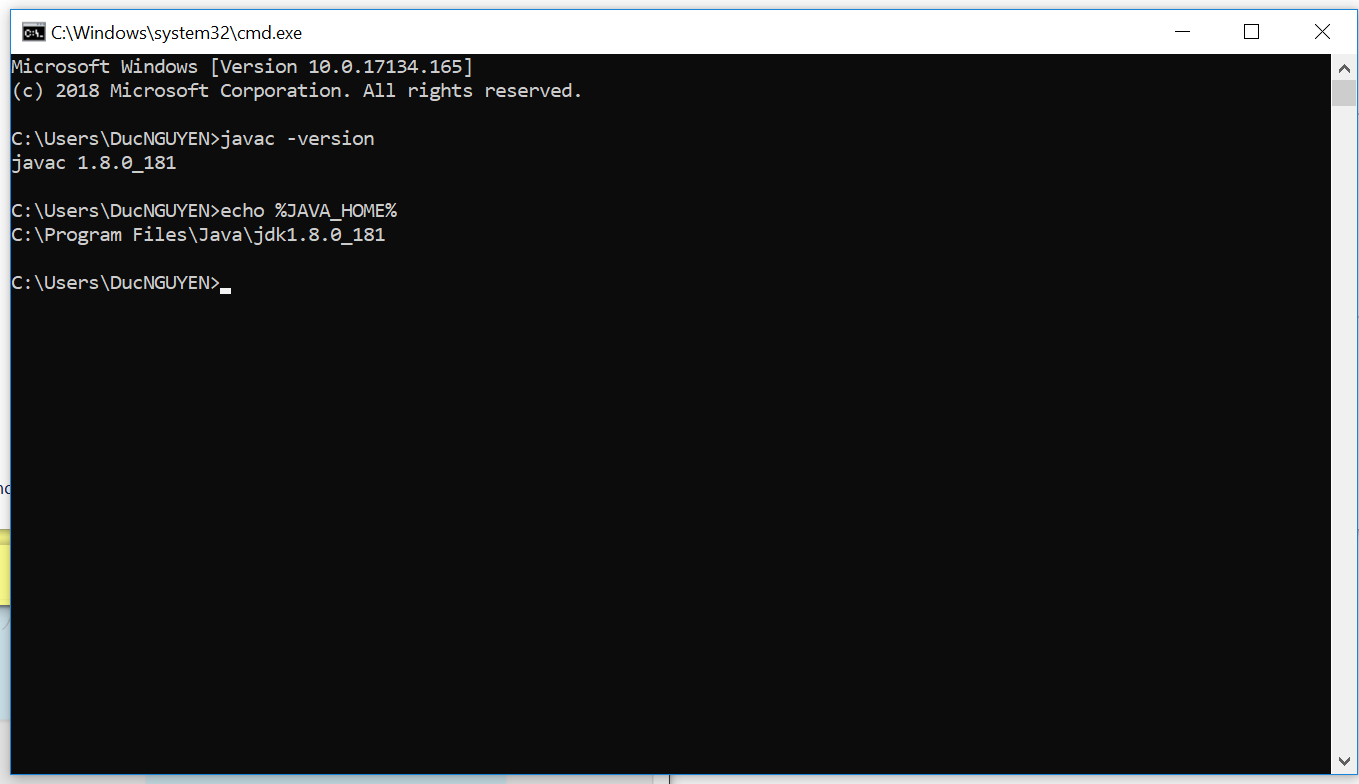
DONE.
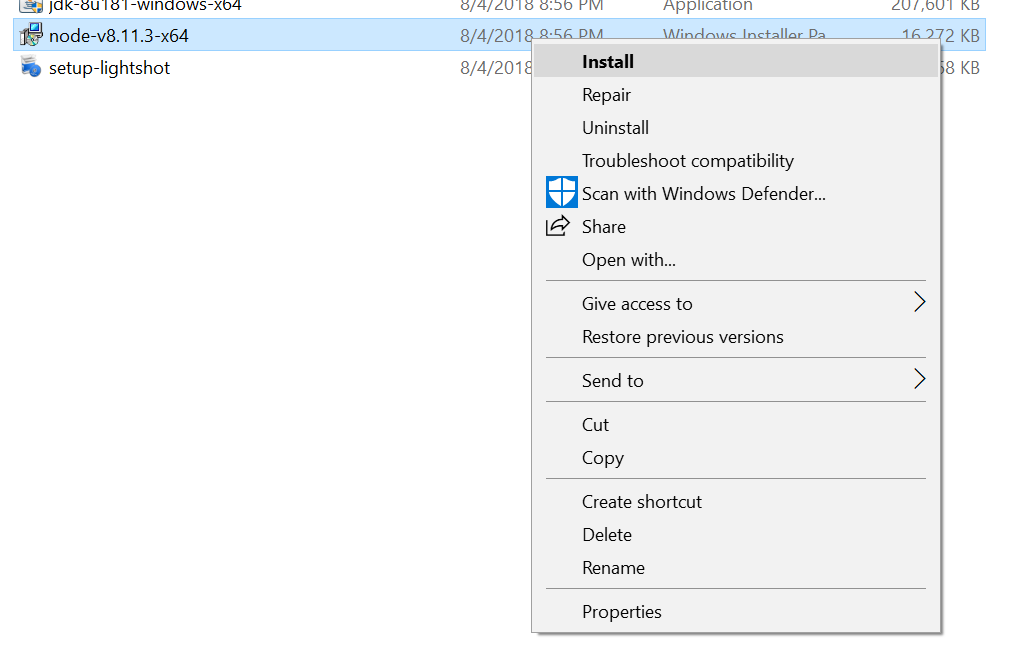 Right click on download msi file[/caption]